 Fashion in a flash. Fur collars are the rage this year on upscale winter coats. Want to add the look to your wardrobe? This beautiful faux fur collar adds an instant overlay of luxury. It was inspired by the sumptuous faux fur selection at Fabric Depot. From realistic animal fur varieties to fanciful colors of curly shags, Fabric Depot's options are wide and varied. We went with the natural fur look of a multi-color Island Raccoon; it featured not only a beautiful depth of tone, but also a smooth and deep pile.
Most faux furs (like real fur) have a specific direction to the nap. If you have trouble seeing the way the fur is laying on your fabric, hang it over a chair and step back a little. It should become obvious. For more about this and other tips and techniques, check out our tutorial on working with faux fur.
The back of the collar is a rich faux suede called Passion Suede, available in a myriad of color choices at Fabric Depot. The surface of this faux suede is wonderfully soft and smooth, but has just enough nap to "grip" and help hold the collar in place against the fabric of the coat.
If you plan on keeping the collar on a particular coat at all times or are worried the suede isn't going to grip as strongly you'd like, you can add cloth-covered hook and eye sets on the collar and coat. Dritz® makes a good option.
Unlike a scarf or narrow shawl that can twist and loop in a free-form manner, a collar needs to lay flat as it arcs across your shoulders. A simple rectangle won't work. We offer a four-part pattern below to create the perfect wrap.
Our thanks to our friends at Fabric Depot for providing the faux fur and faux suede for this project. We got to wander amongst the giant rolls of faux fur fabulousness in the Fabric Depot warehouse to pick just the right style. So much softness!
If you haven't yet shopped Fabric Depot.com, set aside some time to browse. There's always something new, and if you sign up on their home page for the Fabric Depot eNewsletter, you'll be notified first about special sales and promotions, like Tuesday Treasures and Online Flash Sales.
 If you're lucky enough to live nearby or are planning a visit to the Portland, Oregon area, you'll definitely want to stop by the Fabric Depot retail location: an acre of fabric, notions, and more!
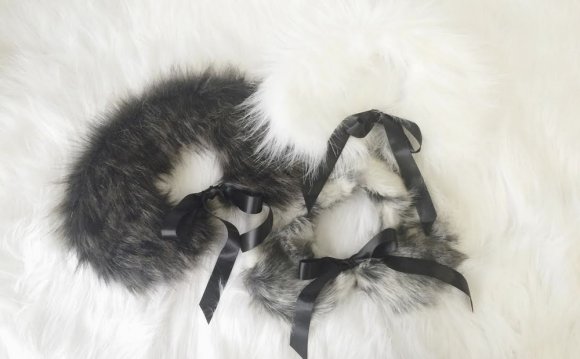
We love the finished look of our sample collar, but there were so many more from which to choose. Below are a couple other lovely pairings to consider.
Our collar finishes at approximately 68" x 8", measuring from the bottom of the descending fur as well as the fur flowing side to side. This is a good length for a medium to long winter coat. For a shorter jacket, or even a heavy sweater, consider shortening the length by about 4-5" (shorten from the bottom of the pattern).
The recommended yardage shown below will allow you to make up to THREE collars with our pattern. You need the length of a full yard to achieve the proper curve at the top and insure the nap runs in the right direction, but because faux fur is traditionally quite wide, you will have extra width. Each pattern piece (each half) requires about 10" in width x 35" in length.
Getting Started
- Download and print the Fur Collar Pattern which incluldes FOUR pieces: Fur Collar Pattern A, Fur Collar Pattern B, Fur Collar Pattern C, and Fur Collar Pattern D.
IMPORTANT: Each pattern piece is one 8.5" x 11" sheet. You must print the entire PDF file at 100%. DO NOT SCALE to fit the page. - Cut out the pattern pieces along the solid lines.
- Following the arrows printed on the pattern, butt together the pieces (do not overlap).
- Tape in place to create the full pattern piece, which represents one half of the scarf.
- Use the assembled pattern to cut TWO pieces from the faux suede.
- The two faux fur pieces will be cut one at a time. Place the faux fur right side down on your work surface. Make sure the nap is running down, matching the arrow shown on the pattern.
- Place the pattern on the wrong side of the fur. We positioned our pattern piece on our fur to take best advantage of the varying stripes of color. Pin the pattern piece in place.
- Trace around the pattern piece with the marker.
- Before un-pinning, make sure you have a clear line all the way around. You need a definitive guideline to follow.
- Flip over the pattern so it is now wrong side up and position it to cut the second half of the collar. Make sure the nap is still running in the same direction as for the first half of the collar. If the two sides are going different directions, it will look very weird.
 Pin the pattern in place.
- Trace around the second half and remove the pattern so the drawn guidelines are visible.
- When cutting, the idea is to cut only the backing and not the fur nap. Use just the tips of your scissors. With the wrong side facing up, slide the bottom blade of your scissors up next to the backing.
- Cut with short, deliberate snips, being careful to cut just the backing. If you feel a drag, you're starting to cut the pile. Back off and start again.
NOTE:
- To create each finished length (fur and suede), you need to stitch together each pair at the center back.
- Place each pair right sides together, aligning the angled ends.
- When pinning faux fur, tuck the fur to the inside as you go so you are less likely to catch up the hairs in the seam.
- Pin along the seam at a right angle, this will allow you to sew right up to the pin before pulling it out.
- When pinning the suede right sides together, leave a 3-4" opening at the center. This will be used later to turn the collar right side out.
- If possible, attach a Walking or Even Feed foot. We used the built-in AcuFeed™ Flex fabric feeding system on our Janome Skyline S7.
- Using a ½" seam allowance, stitch together the fur.
- Using a ½" seam allowance, stitch together the suede. Remember to lock your seam at either side of 3-4" opening. Press open the seam allowance, using a pressing cloth.
- If you followed our 'tuck and pin' suggestion above, you should have a pretty seam. However, working from the right side, you can also use a dull pencil or pointed chopstick to pull stray fur hairs out of the seam.
- Place the suede and fur lengths right sides together and pin in place all around. As above, push the fur away from the raw edge as you pin.
- Using a ½" seam allowance, stitch the two pieces together around the entire perimeter. Go slowly around the upper curve and pivot at the bottom corners. We stitched with the faux fur on top in order to keep watch, pushing in the fur as needed as we removed the pins.
- Clip the corners and lightly clip into the upper curves.
- Turn the collar right side out through the opening in the center back seam of the suede. Pull through one side completely and then the other side. Gently push out the bottom corners. A long, blunt end tool works well for this, like a knitting needle or chopstick.
- Pin together the folded in edges of the suede opening so they are flush with the sewn seam. Hand stitch the opening closed.


new website http://stroi-archive.ru/
YOU MIGHT ALSO LIKE


Share this Post
latest post
-
 Leather Sleeve Fur Jacket January 19, 2018
 -
Leather Sleeve Fur Jacket January 19, 2018
-
 Designer Faux Fur Jackets January 19, 2018
 -
Designer Faux Fur Jackets January 19, 2018
-
 Faux Fur Vest for Cheap January 9, 2018
 -
 Mens Leather Coat with Fur Collar December 29, 2017
 -
 Faux Fur Jackets eBay December 19, 2017
 -
 White Fur Blankets December 9, 2017
 -
 Black Bear skin Rug November 29, 2017