 When I first watched Hunger Games: Catching Fire and I saw Katniss's knitted cowl my DIY mind immediately began making a pattern for it. I never attempted it, mostly because I did not feel like I would ever really NEED a one armed vest thing. It just did not seem very practical. (Does her other arm get cold? Is it an archery thing? I just don't know...)
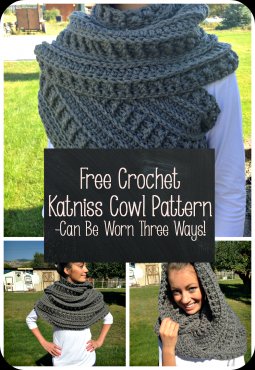
Then not too long ago, my volleyball coach from the good old days sent me a pin to this scarf and asked if I could whip up something similar. I loved that it is just a giant infinity scarf rather than a one armed t-shirt thing. This means you can wear it multiple ways, but still achieve that "awesome" look sported by the Hunger Games victor. However, that particular pattern was knitted and my knitting skills are sadly lackluster. But I spent some time and developed my own crochet pattern.
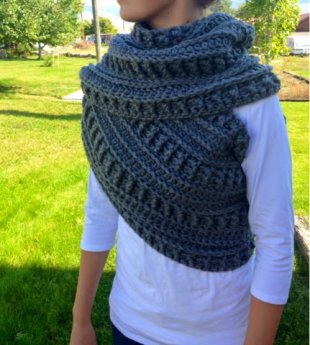
This is seriously a mega scarf, measuring just over 60 inches long and 13.5 inches high (this seems to be the magic length for the perfect "wrap"), and made from almost 600 yards of yarn. If you are worried about the length for yourself, measure it by wrapping around yourself after the first row of post stitches because that is essentially the finished length.
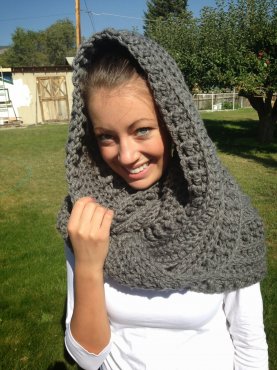
This is a beautiful piece with a lot of detail, and can be worn 3 ways!
The Original Katniss Over the Shoulder Look
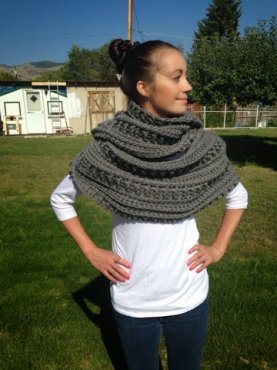
The Wonder Woman Shawl
The Scoodie (Scarf+Hoodie)This is an intermediate pattern, but a beginner could figure it out with some determination.
You will need to know how to front and back post double crochet, front post single crochet and the double crochet. If you don't know these stitches, there are a lot of great youtube videos to help. (And do not be scared to try them- they are the same basic stitches, just put in a different spot!)
 This scarf is also crocheted in the round to prevent some uneven sewing. The pattern is ridged and so can be hard to make the attached line look very neat. I found it was better to attach in the round. It may still be a little "gappy." I suggest leaving a long end and sewing the gaps together just a little bit. There is nothing wrong with a little sewing manipulation! And because of the many ways to wrap and wear this, it is easy to hide that section.
Ready? Here is what you will need to get started.
Size P Hook (11.5)
Large sewing needle for sewing in ends
600 yards of size 6 bulky yarn (I used Bernat Collegiate Chunky in Grey)
EDIT: I have had many people end up with scarves that are TOO big when using an extra bulky yarn. I would stay away from thick, wooly yarns like Wool-Ease Thick and Quick. Some size 5 yarns would work, and some size 6 yarns will not. I stay by my recommendation of the thick Caron yarn. Also, be sure to try on your scarf after a few rows. Because we are not all the same shape and size, you may need to adjust. And if you need to start over, well better after 2 or 3 rows than after the whole thing. The nice thing with this scarf is that you do not need to have a certain number of chains- you can customize it to your own size!
 Row 1: Chain until you reach 65 inches (I am sorry- I could not force myself to make an actual count.) You will want to crochet over the end length of 61 inches because the post stitches pull it together. Connect to form a giant ring.
Row 2: Chain 2, DC across, Join.
Row 3: Chain 2, DC in first stitch, FPDC alternating with BPDC until you reach the last stitch. DC in last St, Join. Chain 2.
Row 4: This next row will depend on the number of stitches you made... But essentially you will FPDC or BPDC on the post crochets you already made. Line up the FPDC with a FPDC and a BPDC with a BPDC (to achieve that nice ridged look!) until you reach the end.Join.
Row 5: Repeat row 4.
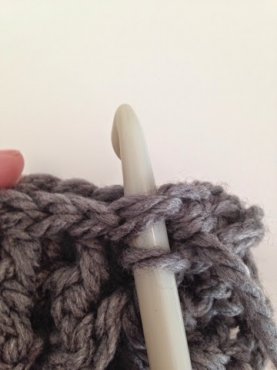
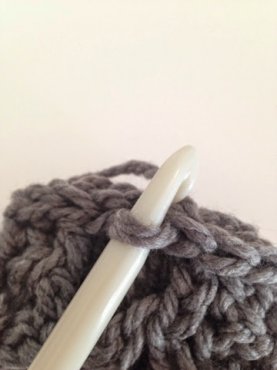
Row 6: Chain one, FPSC in every stitch across. Do not alternate like the PDC. This will give you that straight line. Join to the first FPSC when you reach that point.
THEN slip stitch to the DC made in row 5. The FPSC sit in front of those stitches making that pretty line. But you will want to crochet over the DC BEHIND the line made in Row 6. The slip stitch back just helps for a smoother transition.
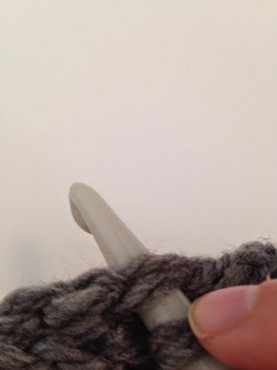
Row 7: Chain 2, DC in each stitch across, slip stitch. (Remember this row is not done in the FPSC you did in the last row but the DC from Row 5)
Row 8: Chain one, FPSC across. Follow the same technique as in row 6.
Row 9: Chain 2, DC across, slip stitch.
Row 10: Chain one, FPSC across. Follow the same technique as in row 6.
Repeat Rows 2-10 twice more.
Then Repeat Rows 2-5.
Finish off and weave in ends (remember to leave that long tail to weave in between the few gaps of your seam!)
I would love to see any of your finished scarves! Post them to my Facebook page and show them off! And if you would like to see som
I do not have a problem with individuals making and selling items using this pattern. I do have a problem if you take my photos and the credit:) No big deal, just use your own pictures and link back to this page if you are selling online! Thanks so much!
This pattern is influenced by an original copyrighted pattern by Bo Peep's Bonnets. You can find the original pattern at You can also purchase the original product here
Share this Post
latest post
-
 Leather Sleeve Fur Jacket January 19, 2018
 -
Leather Sleeve Fur Jacket January 19, 2018
-
 Designer Faux Fur Jackets January 19, 2018
 -
Designer Faux Fur Jackets January 19, 2018
-
 Faux Fur Vest for Cheap January 9, 2018
 -
 Mens Leather Coat with Fur Collar December 29, 2017
 -
 Faux Fur Jackets eBay December 19, 2017
 -
 White Fur Blankets December 9, 2017
 -
 Black Bear skin Rug November 29, 2017